
Here is a quick peek at the headboard:
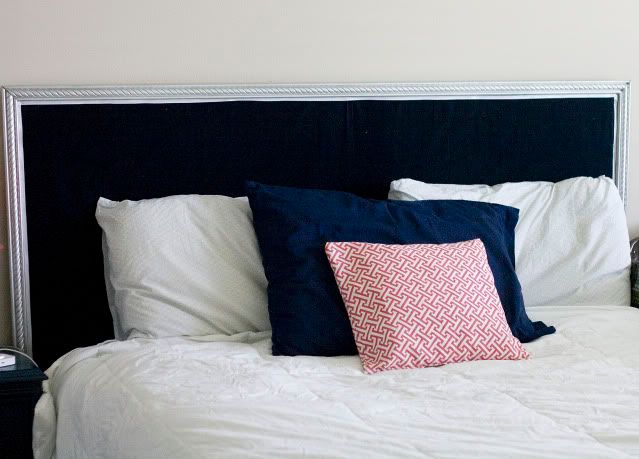
Do I wish I had made my bed better for the picture? Yes. But I'll redeem myself in the final reveal.
I mentioned before that I wasn't going to make the headboard the same way many I had seen many bloggers do. Most of the tutorials I've seen use wood, but that means I'd need some tools that we don't have out here. Plus it would be heavier to mount, again needing more tools that we don't currently have! So instead, I used their basic ideas but skipped the wood. I used foam board as a substitute! I bought 2 pieces of foam board and used duct tape to hold them together. Then I stapled the batting and fabric onto the board. Next, I spray painted the trim pieces and then glued them together with wood glue. To attach the trim to the foam board, I just used a hot glue gun. We rested the headboard on the mattress and then used a few sticky velcro pieces we already had to attach it to the wall. Simple as that!
Here's a rundown of the costs:
Foam Board-$6
Batting-$3
Fabric-$4 (Navy corduroy on clearance at Joanns)
Trim-$14 (Here's where I goofed! I wanted to buy trim by the foot but I accidentally grabbed the fancy trim you by per piece. I had already started cutting it down at Home Depot when I realized my mistake. So I had to buy 2 pieces for $7 each. Oops!)
Total Cost- $27
More than I was hoping to spend, but I'm still under my $200 budget so I can't be too upset about it! Lesson learned? Look before you cut!!
To read about the Summer Rental Redesign project, click here.
No comments:
Post a Comment